If you get a chance take a look at the moon tonight - it's what they call a 'Blue Moon'- which means it's the second full moon of the month (usually there is only one full moon a month). This won't happen on New Years Eve again until 2028. Pretty cool - huh?!?!
(picture from my back yard)
Tomorrow a new day a new year!! I am ready are you?
See ya next year ;0)
What ever you may celebrate this holiday - I hope everyone has a wonderful love filled holiday! And if you don't celebrate anything, here's wishing you a happiness filled day!
If you have never had the pleasure of visiting them - well you realy must! They have the cutest and delightful patterns for children's clothing and handbags ever.
And these are just a few of thier awsome patterns.
Pop over to visit Izzy and Ivy and register to win - they are giving away 4 BIG PRIZES!!!
One lucky winner will win Penelope Ruffles - and ruffles are so in fashion right now!!
breathe slowly, relax, it's ok, breathe slowly, relax, it's ok
What? How Much? No! That Can Not Be! Oh My Goodness! No, There Is No Way I Could Have Spent That Much?!?!
Ooooh, yes that was me right after shopping for Christmas presents tonight. All the happiness, joyful giddyness, and excitement I felt while shopping is gone and now my heart is in my stomach and I am having a panic attach!
Pick up phone NOW!!! and call friend, get ressurance..................
Ok, now everything is ok. I just have a hard time spending anything over 2 digits. Silly - yes. Practical - yes! BUT it's only money right????? Oh my gosh am I getting frugal - hmmmmm maybe, ok YES!
I found Arrange-a-Room on the Better Homes and Gardens web site. I know I should be working, cause I am at work ya-know. But just could not help it, it's addicting, and everyone deserves a break once in a while - right?
This is my sewing room, lovely with a large table, ironing station (the rainbow), bulletin board, my ductape double (the circle in the bottom left corner) filing cabinet, hutch with fabrics, and two small book cases.
ahem........
'IF' I removed the 4 large rubber maid boxes filed with fabric, piles of fabric on the floor, the sewing machine and serger on the large table, and piles of patterns and sewing magazines on the sewing table it might, just might look like this.
sigh.......
Walt Disney once said "If you can dream it, you can do it." :-\ hmmmmm - I don't think he was talking to us sewers/quilters/textile artist types?
This is a great gift idea and a way to use up those fabric scraps. I filled them with girly goodies and will be giving them as holiday gift - cosmetic bags. It finishes up at 4.5" high, 7" wide, and 1" deep at the bottom
For this sassy little bag you will need a sewing machine (with zigzag feature), a zipper foot, 9 inch zipper, basic sewing supplies, a piece of thin cardboard to create a template (I used a empty cereal box), an iron and a serger is optional .
I would rate this as an easy project - but the zipper on a slight curve could be a challenge, if you have never sewn a zipper before please practice on scraps. In the pictures you will see different base fabrics, I was doing assembly line sewing and made 12 bags instead of just one.
For the base I used cotton duck/cotton canvas from JoAnn's, but you could use denim (great recycling idea). You need a somewhat sturdy fabric for the base, the base will become the inside of the bag and where the fabric strips are sewn. Here you can see I found cotton duck in bright orange, cream and green. Cut a 9.5 " by 13" rectangle from your base fabric.
*TIP: use a light to medium colored fabric, this makes it easier to see what your storing inside.
For the outside of the little bitty bag I used 12 - 1.5 inch strips of fabric for one bag. You can use fat quarters cut into strips or scraps sewn together to make the strips. I used the large floral fabric as my color palett to help choose more fabrics from my stash. I used 10 different fat quarters, but it would look just as good if using only 3 different fat quarters.
The above link should open as aPDF and print in the correct size - but check the size everyone's printers are different!! Use the dotted line at the bottom and trace this twice on your cardboard making a pattern with two tops (one up and one down) and the bottom in the middle. (scroll down some to see my cardboard template) Save your template to use later.
Using a long ruler draw a line from one corner to the other. **If using cotton duck or canvas there is no wrong or right side for your base fabric, but if using a base fabric with a wrong and right side you will draw the line on the wrong side of the fabric (do not worry about seeing the line, you will be covering the line with the fabric strips and this will become the outside of the bag). Then draw a second line 1/4" away from the line you just drew. The second line is the guide to line up your fabrics and begin sewing.
Line up two strips of fabric right sides together, place on the base fabric with the raw edge of the fabric on the second line (or the 1/4" from center line). This will make the actual seam line go from corner to corner.
Sew using a 1/4" seam allowance. Press open, next line up another strip right sides together and with raw edges together sew 1/4" seam. Then do the same on the opposite side.
Continue adding strips to cover the base fabric (if you look closely you will see I have two corners not covered, but I checked with my template I then trimed the corners off).
Using the template trace the outline on the base fabric (do not worry about the lines being seen as they are in the seam allowances). This outline includes your seam allowances and will be the line to which you cut out the pattern.
Finishing the edge stops the fabrics from fraying. I used my serger to finish off the edges and cut them at the same time, by lining up the outline with the cutting blade and using a 3-thread overlock stitch narrowed to 1/4".
***If you do not have a serger - no worries!! Cut the pattern out on the line you drew using the template and then zigzag the edge and your ready to go to the next step.
The zipper goes on the curved edge of the fabric. Place the zipper right side down on the right side of the outside, line up the edges together and pin in place. *Tip: line up the bottom zipper stop to the raw/finished edge of the fabric (see below). Use a zipper foot and sew on the zipper. *Tip: when half way through stop with needle in the down position raise the presser foot and move the zipper to the out of the way, as the zipper pull can be bulky and hard to sew around. (in the photo above I started sewing from the bottom of the zipper and then half way I move the zipper to the bottom)
After sewing one side of the zipper, you need to see where to line up the next side. To do this fold over the zipper and note where to zipper stop is, use this as a reference to line up the next side of the zipper. Fold the fabric in half with the outside/strip-ie sides together. Pin the zipper with the zipper edge and raw/finished edges together again noting where the zipper stops are. Sew just as before, and also use the tip to move the zipper pull again if needed (I did).
Unzip the half-way finished bag and turn rightside out, then slowly/carefuly zip the bag closed. Finger press and use an iron to press the curved edge with the zipper.
You should have something that looks like this - your almost done - YEA!!
Now top stitch the fabric on the outside, not only does this make it pretty it stitches down the zipper and keeps it out of the way. This can be tricky but go slowly and start from the top of the zipper and work to the bottom of the zipper using the zipper foot. I used a thread color to match the zipper but that's up to you.
Turn the bag inside out and leave halfway unzipped. *Tip: do not leave zipper closed, this causes a problem when you want to open it and the zipper is sewn closed - ask me how I know. Starting at the bottom of the bag (folded edge) sew up the sides, making sure to put the finished edge/zigzaged edge in the seam allowance, stop just on the zipper tape (do not go all the way off the edge) back-stitch to lock your stitches. Then trim the corners as shown above (see my finger ;0) this will remove the bulk from the corners when you turn them.
To create the bottom of the bag fold the side of the bag down with seam allowances open and line up the side seam to the center bottom (is that clear as mud?). See picture above, the bottom of the bag is on the bed of the sewing machine the side is facing up in my fingers and the zipper is wide open and to the left. (I may need to add more pictures to explain this) Stitch the little corner, back stitching at the start and finish. *Tip: Now if you don't want to make the bottom this way - well then don't it's ok and your finished!
Turn the little bitty bag rightside out, finger press to make nice and neat.
You now have a Little Bitty Bag to give someone a little bitty smile :0)
If you make a bag please show it off on the LaBellaColori flickr group, I would love to see them.
We sometimes loose the meaning of the holidays with all the commercialism and shiny wrapping paper. True gifts come from the heart not the wallet and this was a lesson for me to notice all the things in my life and be grateful for the big and the small. By no means are these all the things I am thankful for, nor are they necessarily in the correct order. To all a Happy and Thankful Day!!!!
I am thankful for happy tears, sunshine, digital cameras, 3 years in Italy, suprises, my hobbies, good hair days, hiking trails, pizza delivery, good movies, my DVR, blogger, a day at the beach, toothpaste, open 24 hrs stores, a second chance, Belgian waffles, the cool side of the pillow, that I have a job, 'Nova & Carl Sagan, sunflowers, bubble baths, filet miginon, Sunday NFL games, converstions with my dad, being a Florida native, and our military.
I can't just stop here at # 82, I have to continue to 100.........
I am thankful for vacations, spell check, red wine, full moons, democracy, a homecooked meal, my car, being a parent, organ donors, butterflies, spring showers, my great in-laws, and diet Dr Pepper
I am thankful for hair dye, toilet paper, nail polish, fresh air, fuzzy slippers, grandparents, fresh bread, Dr. Seuss books, and a home with walls, a ceiling and a floor.
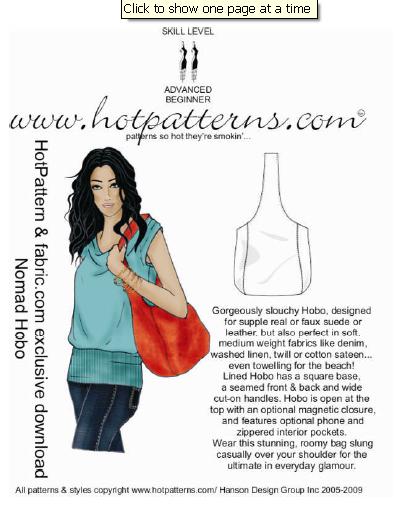
Hot Patterns and Fabric.com have gotten together again with more free downloads. Some of you may have already seen these as a few have been out for a while. I can see all of these as great gifts for the coming holidays!!
Ok, I am so behind lately and I know the blog is suffering - so sorry everyone. I am working on getting a few tutorials together for easy holiday gifts and that has put the purple purse on the back burner for a while. But we can always use new toots - Right?!?!?
(if I could get rid of this "Read More" link - anyone know how???)
I know - no one wants to hear it but we need to start thinking about Christmas. It's not to far away, and it's just far enough to get lazy and wait. Last year I made cute small gifts for friends and coworkers. We all can understand that with money tight this year we can't just go out and buy everyone we know something, so a small hand made item is just the right solution.
The internet is a great place to find helpful tutorials from so many lovely people!!
Are you or your family having a fun time getting ready of Halloween? My family is, and even though I haven't been able to participate as much they are.
My husband has been working diligently in the garage making mischievous Halloween props. Don't ask me, cause I am way to scared to step into the garage to take a peek. You never know what lurks in there during this time of the year.
My son has been busy creating realistic armor for his costume. The internet is a wonderful thing, he found Penwiper that has great tutorial for armor made from craft foam. Absolutely amazing!!!!!
I have been asked to make a 'Tabard', never knew what a tabard was untill now. So until I finish this, my purse will have to wait. (but I need so badly to finish it, it is fall now and I NEED MY FALL PURSE ;0)
If you've been keeping up with what's going on here you have seen Purple Purse Part 1 .
So far I have decided I want a deep purple or as some say a aubergine in a suede like or velvet fabric. I located a pretty aubergine at JoAnn's. It's a knit with VERY little stretch, but to combat this for my test run I fused woven stabilizer to the back of the pieces. I cut out over sized pieces of woven stabilizer for each pattern piece (starting with just the two front and back pieces. Fused this to the fabric and then cut out the pattern pieces (only the two front and back outsides at this point).
Stitched the two front bottoms together, then lightly pressed (did not want to lose the faux suede look of the Alova fabric) the seam open.
Then I top stitched the center seam allowance. In the photo you can see the white of the woven stabilizer and the deep purple fabric.
This photo is upsidedown, but you can see the pressed open seam allowance and the pleat markings. I marked the pleats, then noticed that the pleats could be placed differently. So I remarked them and pin folded the pleats to test.
Here I show how I sewed the pleats. Starting from the folded edge (closest to my finger) I back stitched and had the machine in the needle down position. Sewing the pleat in a reversed 'L' back stitching at the beginning and the stress point (at the corner, after turning the fabric to start the long end or the reversed 'L') and again at the end of the fabric edge.
Here you can see the end result of the pleats, although the picture is bad (as I had to lighten it a lot so that the photo would show the pleats).
Next to sew the top piece to the bottom pieces to complete the front and back. (wish me luck!)
Actually it’s been a couple of those weeks to say the least!! I have not stepped into the sewing room once. At the office we are working on a deadline, and that always makes me exhausted at the end of the day. With Halloween coming my family has been creating fun Halloween decorations, although I have yet to join them I do feel bad I haven’t had the time to help. Pattern Review is having a contest for 'The Little Black Dress' and I oh so need to do this one - BUT can't seem to find the time. Hotpatterns and Fabric.com have gotten together and posted a free Cowl Neck Top. The top looks great and easy to do - oh and did you see Hotpatterns new Classix Nouveau Pyramid Bag, lovely!!!! Got to finish drafting my purple pleated purse and I keep wondering when when......
It all starts with an idea, then comes the pencil and paper. I want a very feminine deep purple purse in either faux suede or velvet. I pulled out some graph paper and started on a very primitive outline. I want softness both in fabric and design details. Soft pleats or gathers will evoke a feminine feeling and softness.
Next I made a cleaner line drawing showing the details I want to incorporate, topstitching and the placement of the pleats (as you see in the picture above).
I use Pattern Ease for tracing and drafting patterns. First I trace the purse front at actual size (no seam allowances that comes later). In the above picture you see the purse front including the top band.
I then trace the front again without the top band and add seam alowances. Then trace the top band and add seam allowances also. I used a seam allowance of 1/2 inch. This will be the top band for the inside and outside, I will cut 4 of the top band from the out side fabric. The bottom front is traced and 1/2 inch seam allowance added and then becomes the inside lining pattern, from this I will cut two from the lining fabric. Later I will show how I drafted the inside pockets.
I retrace half of the bottom front without seam allowances these will be added after I add the pleats. Using the front bottom I marked where I wanted the pleats. Starting 1 inch from the center front I added the first pleat marking and 1 inch out another and so on until I had 4 pleats marked. Then cut and spread to add the extra fabric to create the pleat. Each pleat uses 3/4 inch of fabric and by taping to a piece of scrap Pattern Ease it helps to keep everything even. I then retraced the outside front bottom pattern piece and added 1/2 seam allowance as before.
In the summer of 2001 we vacationed in the Naples area, having the pleasure of living in Northern Italy at the time it was affordable for us to drive to the region of Campania. We visited Naples, Pompeii, Mount Vesuvius, and Paestum. We had wanted to visit the Isle of Capri, and tour the famous Blue Grotto (Grotta Azzurra), but were told the sea was angry and there was no way we could go. So we decided to tour the island Ischia off the north coast of Naples, the biggest of the three islands in the gulf of Naples.
I was a fun time!! While walking through the piazza we were approached by a man selling coral necklaces. It was a dainty strand of what looked like seed beads. We of course said "no, thank you", but he continued telling us how it was real and the best. He even bit the beads and broke one off, saying "real, real". All I could think of was how odd of a way to ruin your teeth. He kept at us as most street vendors do, but then being in the good mood we were my dear husband bought the neacklace for me. Now mind you we knew it could not have been real, but felt it was a fun souvenir. I still have that necklace and when I wear it I always remember the beautiful island of Ischia.
Just this week I was reminiscing about the beautiful island, and all the fun we had. When I came across a question someone posted at Fabsugar on the coral choker necklace Giada de Laurentiss was wearing in a photo.
'La Bella Figura'
Italian women have a elegant style about them and take pride in the way they are dressed. Giada is definitely a very stylish Italian woman! I got to thinking that I could use a coral choker in my wardrobe arsenal and off to AC Moore I went.
I purchased seed beads, faux coral nuggets, random faux coral shaped beads, gold bead caps, small gold beads, gold lobster claw clasp, jump rings, .038mm nylon coated beading wire, #1 crimp beads, brass 20 gauge wire, and crimping pliers (you know, just like the guys - we gotta get the right tools for the right job!).
I made 5 stands of beads, two strands of just seed beads, one of seed beads and gold beads, one of seed beads and nuggets, and one of seed beads and the random shaped beads. Then loosely braided them before adding the bead caps. So what ya think?? Ya want a toot??
The basic denim skirt with front fly zipper, scoop pockets, an top stitching details. A back yoke, patch pockets, and kick pleat. Very easy to sew, with the exception of the fly front. Not a beginner pattern, but not advanced at all (I used Debbie Cook's toot on fly front zippers). Thanks again Debbie!!
All the seams were sewn using cotton covered poly thread in navy with a denim needle and the seam allowances were finished on the serger with a three thread flatlock stitch. Sewing denim can be a challenge, and it was for me this time as I used YLI Jeans stitch thread and a topstitching needle for all the top stitching. Well, a top stitching needle will not go through more than 3 layers of denim at one time. It was a sight to see me trying to sew the top stitching, and if you were in ear shot - well not very lady like noises were coming from the sewing room. YLI Jean Stitch thread is much thicker thread than say Coats and Clarks top stitching thread and it would not fit through the jeans needles so I had to use a top stitching needle for the YLI Jeans thread. I not a big fan of Coats and Clarks threads - but next time I will be using thier top stitching thread for denim!
Here's a close up on the design I digitized for the back pocket. It's really a basic continuous quilting design. This was stitched with the YLI Jeans stitch thread also but only through one thickness of denim. I embroidered on the denim and then cut out the pocket and sewed it onto the skirt back.
Now to have some quiet fun and a margarita.......................