Monday, March 24, 2014

Wonderful New Beginnings

“A new baby is like the beginning of all things - wonder, hope, a dream of possibilities.” - Eda J LeShan


My dear friends have a baby boy on the way, such a great blessing for a very deserving couple!! I wanted to make something they could enjoy and celebrate with their new baby.  I had to keep it a secret as the new momma-to-be watches my posts, but now that the baby shower is over I can share :)


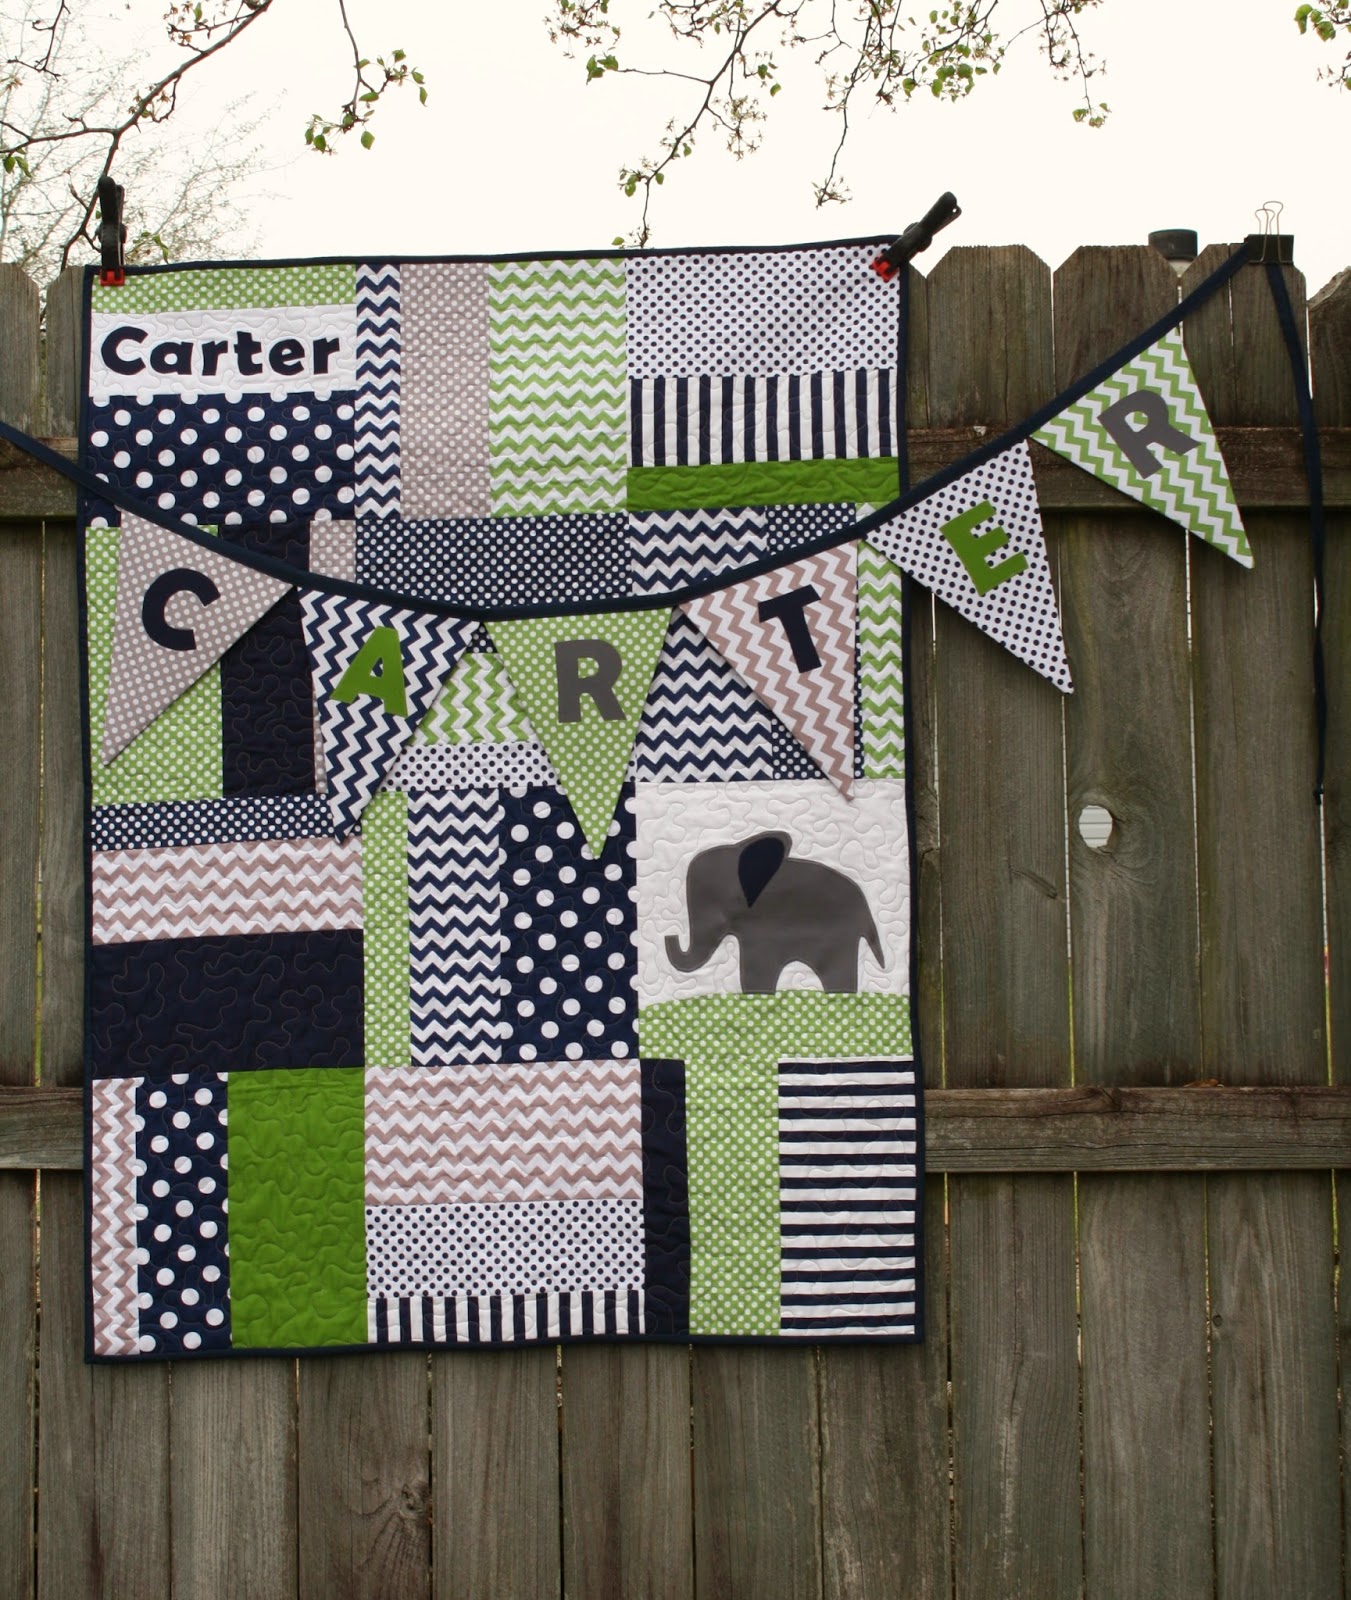
Carter's quilt was made using Amanda of Jedi Craft Girl's Monster Truck Quilt Tutorial. Her tutorial is perfect! It was quick and easy, and so cute too! The finished measurements on this quilt is 36" by 48". I used the 12.5" blocks (12" finished) in a 3 by 4 layout, total blocks used were 12. Instead of a monster truck, I went with a cute elephant applique very similar to the couples nursery decorations. I found the applique at Sew4Home's post 'Super Cute Animal Applique Pillows'.


The nursery colors are navy, green, gray and taupe. Which made this a great quilt to use Riley Blake's chevrons and dots fabric prints, along with Kona navy, ash (gray) and green. I use a raw-edge applique technique for his name and the cute elephant, and stitched down with a simple zigzag stitch. It is quilted with a simple meandering quilting design with gray thread.


For the banner/bunting I also used raw edge applique and the same fabrics as in the quilt.


Using Noodlehead's Divided Basket pattern and fabric scraps from the quilt, I finished up this cute fabric basket just in time. I highly recommend the Divided Basket pattern - great instructions and very well written!


I love all the room in there!!


And also to add in the basket - 5 burp cloths and a flannel receiving blanket.  Had a wonderful time at the baby shower and the couple love all the gifts they received. Looking forward to meeting Carter!! xoxo

~A baby will make love stronger, days shorter, nights longer, bankroll smaller, home happier, clothes shabbier, the past forgotten, and the future worth living for.~ Anonymous 

Monday, March 17, 2014

How I Create Diagrams for Tutorials in MS Paint


Recently I was asked how I create the diagrams I use in the tutorials I make here and for the ECMQG blog lottery block tutorials. The answer is kind of funny but I use the basic old program that comes with just about every Windows based computer - Paint. This is a very quick tutorial of MS Paint - if you have any questions please let me know I would be glad to answer them.

MS Paint is a very basic drawing program, and while it won't do what other more advanced programs will, you can learn to use it when needed.

With Paint you build from the bottom up as Paint doesn't have 'layers' like more advanced programs. The trick is to save as you go, but save different versions just in case you change your mind, and the last change is not what you wanted. **Also when saving make sure to use .jpg file extension which is easier to use in other programs.


I will walk you through how I created this diagram for cutting squares for a block tutorial.

Open up Paint

Make sure the working area is the size you need it, the bigger the better! You can crop away excess later. To make the work area larger left click and hold the bottom right corner and stretch. 


Next I clicked on the shapes rectangle tool (it makes squares too) and made sure I have selected the color 1 as black (you see it highlighted in orange in the picture below).


To the right of the shape tools there is the size box, if you click on the arrow a drop down box appears and you can change the line thickness. 


To create the square left click and hold then move the cursor until you are happy with the square size and shape. You can always click the return arrow in the upper left hand corner and start over.


Now to make the 'red' cutting line, click on the shape tool that looks like a line. Also select color 1 as red and choose your line thickness.


Just like creating the square, I used left click/hold with the cursor starting in the bottom left of the square at the corner and and dragging to the upper right corner to draw the line from one corner to the other. Again if it is not where you like it you can always click the return arrow to start over.


At this point I save it with a generic name. That way I can work on it and if I happen to make a mistake I can go back to the original and start over.

Now to make the text.


You want to click on the 'Text' tool to select it and click on your choice of text color by selecting color 1.

Again left click hold and drag to create a text window or box. 


Above you can see after you have created a text box the text tools open up - this is where you can change the font and size.


After choosing the font and text size, enter ythe text. **Do not click outside this text box, if you do you will not be able to edit the text anymore. (Paint does not have spell check so carefully check your spelling) 


As long as the box is open you can edit the text, you can move the text box and add to it. Once you have the text where you want it click outside the box and it is now locked into the picture.


Continue to add text or shapes until you have the picture the way you would like. Save again at this point.

Now let's crop it to a manageable size, select 'Select' -- yes my bad, but its funny :)


And place your cursor at the top left of the area you want to keep. If the dotted outline is not where you want it to be just click somewhere out side the selected area and start over. 


When you have the area selected, go back to the tool bar and select 'Crop'.

Save and use.


Now go have fun in Paint, play around and learn what a simple basic free program can do :)

Related Posts with Thumbnails