Monday, December 16, 2013

A Plan of Attack: 2014


With Christmas in just a few days and New Years around the corner, thoughts of a 'New' year for quilting and personal growth are percolating in my head. But you know what - I really hate New Years Resolutions. I am not a very focused person, I can't for the life of me stick to any one project before starting a new one. So the thought of making any resolution scares me because I know I will fail!

BUT... There are a few things that I need to work on and there are things I want to accomplish and without forcing myself to try and make these changes I won't be able to grow and possibly achieve some of the goals I would like to succeed at. (deep breath)

The first goal I want to work on is to take my blogging more serious. Blogging for me has been a big learning curve. Although I have had my ups and downs I don't think I have taken it seriously. I would like to try and post at lease once a week on the things I am working on. I also want to do a weekly themed post with a 'learn this' or 'tips and tricks to quilting' or other fabric related information.

I am guessing that organization is the key to developing a consistent blogging schedule, or at least I hope so!


Erica at Confessions of a Homeschooler has designed this clever blog planner and its free!! She designed it with everything in mind for the blogger. There is a monthly calendar on one side and plenty of space on the other side to list ideas, statistics and more. She included pages for giveaways, advertising and brainstorming. This just might be a big help in accomplishing my first goal! Erica also has lots of other printables on her site, go check it out here

This is just one of the goals I want to complete in 2014. I have many others that I'd like to share, but will focus on this one for now.

What tips can you share about blogging?

Friday, November 29, 2013

Grazie Mille!! Bel Fiore Star Tutorial

The quilting community has helped me grow in so any ways and I wanted to give back. How could I say thank you to so many? Well....

Remember this mini quilt  for the Schnitzel and Boo Swap?


I had quite the response on flickr and instagram, all good actually. So much that I decided to do a tutorial on this design, but instead of a mini I want to do it in throw size. As a big thank you!!


I made this one in Christmas fabrics but the quilt can be made in many different color ways. It's such a fast design that it can be sewn up in a weekend (I made the top in one afternoon). In this version I used kona white as the background. For the prints - Ann Kelle's line 'Jingle' in tossed snowmen, tossed penguins, boys in hats, birds in hats and retro snowflakes in lime, also Makower Christmas 2013 trees, flowers and snowflakes from fabricdepot.com, and a ornament print I grabbed from JoAnn's.

Bel Fiore Star

Quilt finishes at 60 x 60”
Fabric Requirements

Print fabric for Unit A (corners) & C (center)
o Fabric 1 - 3/8 yard
o Fabric 2 - 3/8 yard
o Fabric 3 - 3/8 yard
o Fabric 4 - 3/8 yard

Print fabric for Units B
o Fabric 5 - 3/8 yard
o Fabric 6 - 3/8 yard
o Fabric 7 - 3/8 yard
o Fabric 8 - 3/8 yard

Background 2 3/4" yards

Backing fabric 4 yards

Cutting Directions


From each fabric 1 thru 4, cut 1 - 10 ½” square and cut 2 – 11” squares.
From each fabric 5 thru 8, cut 2 – 11” squares.
From background fabric cut 4 – 10 ½” squares and 16 – 11” squares


Assembling the Units

Units A

Using the 8 – 11” squares from fabrics 1 thru 4 place a background fabric 11” square on top of each with right sides together.


Draw a diagonal line on the back of the background fabric from corner to corner.
This line will be used as a reference when sewing.


Sew ¼” on each side of the drawn line for all 8 sets. 


Cut on the drawn line, this creates the 16 Half Square Triangles (HST) needed for units A and C. 


Press towards the dark fabric and trim to 10 ½”.

Put 2 each of fabrics 1 thru 4 HSTs aside for a total of 8 HSTs
(some of these will be used to create unit C).


Next sew 4 - HSTs to 4 - 10 ½” background squares, press towards the background square.

Sew 4- HSTs to the fabric matching 10 ½” square prints and press towards print fabric. 


Assemble the units by sewing together to create 4 unit A blocks.

Units B

With the 8 – 11” squares of fabrics 5 thru 8 place a background fabric 11” square on top of each with right sides together.
Draw a diagonal line as before on the back of the background fabric from corner to corner.
Again sew ¼’ on each side of the drawn line for all 8 sets and cut on the drawn line.
Press and trim to 10 ½”.


Sew the HSTs together in rows, press seam allowances open (this helps reduce bulk when sewing the next step). Then sew the rows together to create the unit B blocks and press seam allowances open.


Unit C

Take one of each HST print fabrics you set aside from unit A and arrange so that the background fabric is in the center and sew these HST together. (this is where I like to lay it all out on the floor and match up the fabrics)

Press seam allowances open. (You will have 4 HSTs left over, you could use them on the back or make a throw pillow with them)

Sewing the Quilt Top Together

First layout your units and arrange the blocks so that units A point to the same color in unit C.
Sew the units in rows and then sew the rows together,
press seam allowances open.


Create Backing and Finishing the Quilt

For the backing cut the 4 yards into 2 – 2 yard pieces and trim away the selvage edges. Pin with right sides together along the selvage trimmed edge and sew.
Press the seam allowance open.

Layer the quilt with batting and backing and baste.
Quilt as desired and bind to finish.


Friday, November 15, 2013

In the Shadows...


I joined in the Schnitzel and Boo Mini Quilt Along back in October, but didn't post anything about it because I wanted it to be a surprise for my swap partner. I am horrible about keeping a secret and if I had posted about it I might have mentioned something I shouldn't. 


My swap partner listed orange, pink, gray and anything cheery as her favorites. I really wanted to play with solids and her color choices were just perfect for this. When I went shopping I pulled out all the solid fabrics that fit in this category and then narrowed it down to 8 colors and the dark gray. Made from Robert Kaufman Kona Solid fabrics in the colors cerise (my fav!!), if I only had saved my receipt I might be able to list the other color names - sorry and the background is Charcoal. The bright colors against the dark gray background make the colors much richer than they appeared on the bolt.


The finished size is 22" by 22" and made entirely of 4" half square triangles. I used Karen at Sew Many Ways method for creating the HST. I am sure there are patterns out there like this, but I just arranged the HST until I got the placement where I liked them.


The straight line quilting was done on my Pfaff 2122. I was so unsure about the quilting that I even asked quilting questions on instagram and the response was to continue with the straight lines. But after I washed it I love the quilting now.


As always I work right down to the last minute and then almost forgot to take pictures. I took all these pictures at work in the parking lot, although not the best glamour shots they will have to do. This quilt remained unnamed, mainly because I wanted the intended owner to name it, but when I was picking out photos to use for this post the one above told me what the mini quilt name should be for me at least - 'In the Shadows'.

You know those times when you are struggling with life and everything seems so empty? (Believe me I do, depression affects so many people and I have dealt with depression for most me life - although that is another story for another day.) Things may seem dark, gloomy and and empty - just as your about to give up, there is that tiny twinkle, that little light in your dark abyss and you fight to reach it. And eventually you see it and its bigger and you gain that tiny bit of hope and it grows. That is what this mini says to me - In the shadows there is always hope!


I sure hope my swap partner loves this little quilt as much as I do. I almost wanted to keep it because it's such a happy cheerful quilt. It's on its way to you partner :)


Thanks for hanging out and letting me tell you about my quilting adventures in life!!


Monday, October 28, 2013


The hubby and I went camping in Alabama last week after the hectic past few weeks we have had. Work and quilting obligations have worn us both out, we needed to re-charge our batteries!!


The main activity was relaxing!! We also hiked to the highest point in Alabama - Cheaha. It was beautiful there!! 


Mostly we relaxed, walked to dogs and experimented with cooking over a camp fire.


I did manage to visit quite a few shops during our trip. We stopped at Pale Moon Yarns in Andalusia, which by the way has a large amount of quilting fabrics and many beautiful yarns!! Thimbles in Birmingham carries beautiful heirloom fabrics and quilting cottons. And the last shop we stopped at was Sew Bernina in Montgomery, they have a friendly staff and modern fabrics.


Last night I started a secret Christmas swap project doing improv trees, which is due on Nov 9th at the quilt meeting. More about this later...


The fish bags are done and in the nick-of-time!! I was finishing them up during the last guild meeting - the time they were due, so I don't have any good glamour shots of them - sorry.


The Boo Bat mini quilt is finished and my swap partner loved it! This picture is from the ECMQG site here.

Now it's back to work and more deadlines - gotta make that money so I can play with fabric :)

Tuesday, October 8, 2013

Perfecting the Scant 1/4" Seam Allowance for Quilting {RePost}


I've had a lot of people ask me lately why their blocks are coming out smaller than they should, so I thought I'd re-post and oldie but a goodie on Quilting 101.

Sewing an accurate 1/4" seam allowance is absolutely essential to success in quilt making! If seam allowances are too large, wide, or 'fat'; the finished block will be to small or out of wack (so to speak). Just think about how many pieces and seams there can be in one block.


For example this Clay's Choice Block (above) has 32 seams, in the end the block can become so distorted that it ends up not the intended size or the pieces in the block also will not fit together. If the seam allowance is off by even just a tiny teeny weenie bit these small 1/64" or 1/32" differences when multiplied by at least three can add up! Well, you can see how the inaccuracies can become very troublesome. The same is true of the width of a seam if it is too narrow, only this time the resulting block would be to large.


Just because you have a 1/4" foot does not mean your sewing a scant 1/4".

Key word here is scant not exact, a scant 1/4" refers to making the width about two threads or 'hairs' less than the very accurate perfect 1/4" seam. This allows for the turn of the fabric when the seam is pressed, either open or to one side. This can make a large difference in how your finished block measures.

Check your seam allowances!


Accuracy Test
(yep it's a pop quiz)


Cut 3 strips 1 1/2" by 3 1/2", sew these strips together along the long side. The finished block should measure exactly 3 1/2" by 3 1/2" when finished and pressed.

If your piece is wider than 3 1/2" try sewing a new set of strips and widen your seam allowance just a bit. Or if your block is to narrow, make a slightly narrower seam. After testing and finding that sweet spot - place a a piece of painters blue tape on the throat plate or machine bed to use as reference when piecing.


Of course all this being said, quilting is for the fun of it. If you sew a block and its off then don't despair use this as a wink from the artistic spirit in you and create textile art as you so see fit!!!!


Monday, September 30, 2013

Busy, busy...

Now there is always a project on my plate, but right now there are several.


Finally I have started working on the hexagons from the Hexagon Swap on flickr from over a year ago.  I am assembling the flowers on my lunch hour at work. The plan is to eventually have enough flowers to make an applique throw quilt. 


Assembly line work on a dozen fish bags for the ECMQG bazaar in November. I have 4 done and 8 more to go. 


Using Amy Butler's Weekender Bag pattern to make a bag for my singer featherweight. I have the outside panels pieced but they need quilted.


Two feathers are partially finished for the bag outside pockets. I love Denise Schmidt's Florence line!!

So there you have it - busy busy!! What are you up to today?

Sunday, September 15, 2013

ECMQG Scrap Swap Challenge 2013 - Her Light Within

I feel like this post should have the song 'Dust in the Wind' by Kansas playing in the background, not because it's sad - but because the beauty of life is so often taken for granted. We are perfect/complete/beautiful creatures and rarely do we celebrate just who we are.

Ok, back to the real world (the original post here), I wanted this to show the heart and soul I see from this person. Or celebrate her!


If it were not for her scraps being so awesome and so in-tune with her, I could not have made this! She loves the ocean (the blue fabric), she loves the sun (the oranges), she has an uncanny way of understanding and caring for people and in a very nurturing way (the awesome text prints). I just added the kona white for her love of the beach (the beautiful white beaches here) and more teal blue in the binding for more of water feel to the mini quilt.


My points are not perfect, but neither are we as humans - that's the beauty of us!


I wanted the quilt to show how she is - bright, cheerful, and loving. The sun points are pieced, like we build our lives bit by bit. The small sun is her heart, it shines so brightly sending out love from within her.

I stole this pic from Cindy
Here Cindy took a picture showing the size of the small sun points as compared to a dime. To be honest they are small but no different to make than the large sun points.


I just loved the large text print in her scraps and had to put it in the back, just a reminder of our childhood innocence (the Neverland text fabric from her scraps, please someone tell me the fabric designer sorry).


The label is simply a mimic of the small sun printed on fabric.


'Her Light Within' is 18" x 18" all quilters cottons, designed and quilted on a home machine.

Sometimes what is in my head translates into fabric and sometimes - well, it doesn't. This time I feel it did, and that's wonderful! But that's the way of life - sometimes you do the right things and well, sometimes it won't always turn out like you'd hope.

I hope you take a moment and revel in the beauty of life and those around you that make life so much more pleasurable to be living!!!

Sunday, September 8, 2013

Getting to know Florence

I recently adopted (yea I'm a bit crazy) a pretty little girl named Florence. She's a petite little thing and has a lot of spunk.

A singer featherweight 221, and I am so luck to have her! My husband found the listing on E-bay and at only $150.00 we couldn't pass it up. The seller said that the motor hummed, but didn't say anything about sewing. This had us a bit concerned but we took the chance anyway.

When the box arrived I pulled the machine out and was amazed by the condition.


Florence is in great shape all except for one blemish in the paint on the fold up bed of the machine. Of course there are pins scratches, this is normal for older sewing machines.


All the decals are in excellent shape, hardly any wear. I can't say the same for the case, it's in very bad shape.

I plugged it in and fearfully pressed the foot peddle, the motor hummed but the machine sewed very slow almost not at all. After inspecting the motor by removing the belt I found the motor ran great. I put the belt back on and checked the belt tension again I tried sewing - still slow very labored almost. After 30 minutes of fiddling I discovered the bobbin winder was tightened down onto the belt and keeping the belt from moving freely. Yes, she sews!!! Amazing something so simple was the issue.


She has a Centennial Badge which I found means "Singer, rightfully proud of its company history, decided to celebrate its centenary in 1951 by giving all machines made that year a special badge. This was the standard Singer emblem of the time but with the inscription "A Century of Sewing Service 1851-1951" around the outside of the oval.
These "limited edition" models made for only one year are becoming increasingly difficult to find. Most have 1951 serial numbers but authenticated models with 1948 to 1952 serial numbers have been located - suggesting that the company held vast stocks and simply badged machines just prior to dispatch. The Centennial Featherweights are mechanically identical to the standard 221 - and only the badge identifies them cosmetically."  I found the info here.


The serial number dates the machine around the end 1950, if you want to date a Singer machine Singer Co is the place to go!

I have been researching the care of Singer Featherweights, not only the basic maintenance but the repair and restoring of these beautiful machines. I spent the day yesterday taking apart the motor because I didn't read before oiling the machine and put oil in the motor grease ports - a BIG NO NO!! Never ever put anything but Singer Lubricant in the grease ports, oil can end up varnishing the commutator (a fancy word for the guts of the motor) and permanently ruin the motor.

I will post pictures tomorrow on the cleaning of Florence's motor and the links to all the great internet resources I used to do this.

Right now I've got the put the binding on that 'Secret Scrap Swap Item'.

Happy sewing!


Thursday, August 22, 2013

Scrap Swap Challenge? - Accepted!

Every year on ECMQG anniversary we do a scrap challenge (here is the Dec Christmas challenge and last years anniversary challange pics). Everyone that wants to participate brings a quart size zip-lock baggie filled with scraps which are placed in brown paper bags and at the end of out meeting they are randomly drawn. You then talk to the owner of the scraps and find out what they would like to receive. Sometimes they have a particular need/want or as with my partner and dear friend Cindy, I was given freedom to create anything. We are allowed the use of only one other fabric and a binding.

Cindy's Scraps

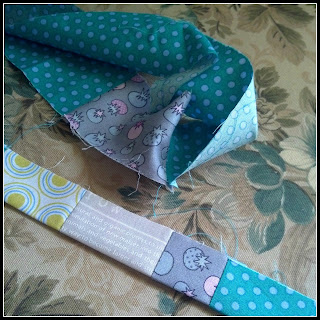
I went home that afternoon and dumped the scraps on my bed sorting them, the scraps are lovely shades of orange, low volume, a cute gray tomato print and a larger strip of an aqua print.


The orange prints in my grandmothers old bowl.
Immediately I knew what I wanted to make, but I can't really say just yet because Cindy reads my blog. So I apologize I can't spill the beans on this one until the September meeting.

I am so excited and wish I could show you, but darn it I can't and that makes it even harder to stay quiet! 
I can show you some sneak peeks for now...

Teeny Tiny Piecing
Ignore the sad thumb nail, my hands have taken a beating lately. These pieces are very tiny, and at an awkward angle so I had to use lots of pins.


Pins, pins and more pins.


There are just tiny little scraps left of the original scraps.


Working on the low-volume scraps next, still not sure if what is in my head is translating into it yet but I can't share that with you either - sorry.

It's not finished and I have so much more to do, but it should be completed by the deadline and I'll post pictures after I give it to her.

Have you ever worked on something that excites you and you want to show it to everyone but can't?
Related Posts with Thumbnails